Showing posts with label elementary. Show all posts

Thursday, July 11, 2013

The One and Only Ivan by Katherine Applegate – Book Review

The One and Only Ivan by Katherine Applegate – Book Review


The One and Only Ivan by Katherine Applegate with Illustrations by Patricia Castelao was a surprising hit recently with our book club. From our youngest member, at 6 years old, to the elementary kids, the young teen, and even the parents all were enthusiastic and excited for our discussion. It was one of the most positive responses we’ve had to any of our titles so far.

I believe it works so well for so many different ages and people because it has subtle layers. The story is told from the point of view of Ivan, a gorilla who lives in a roadside mall arcade attraction. He doesn’t like to remember things, and so he doesn’t dwell too deeply on any of the issues or events that come up, but for all the simplicity of how events are told, there is still an emotional power to them.

For our youngest member, it was a straightforward story of Ivan and his quest to keep a promise. For the older members of our group, we could see beyond the simpler story to the bigger internal struggles that many of the characters fought with as Ivan describes their actions.


Another aspect that gave the book an additional level of interest is that Ivan was a real gorilla. He did in fact live at a roadside animal attraction, was originally captured with his twin sister, and spark the community to work for his release to a better home. Although I believe, the rest of the actual events of the story are fictional. The real Ivan eventually was moved to the Atlanta Zoo where he lived out the rest of his life. The zoo website has a nice page about his life: http://www.zooatlanta.org/ivan

Tuesday, June 25, 2013

Make a Scale Model Solar System - Fun Stuff to Do Anywhere

Make a Scale Model Solar System - Fun Stuff to Do Anywhere

Back when my oldest wanted to learn about the solar system for the first time, I obviously thought we should make a little model. Once I actually got a closer look at all those kits they sell in craft stores and elsewhere, I was disappointed. There was never any sort of consistent scale. For example, in most kits Jupiter is bigger than Earth, but sometimes, not by much. In some kits the sun was even smaller than Jupiter.

Now, I know making a scale model solar system is hard, but I felt so many of these kits would be misleading to young kids who don't realize how different these packaged solar system kits are from reality. They just don't do justice to the vastness and the amazing sizes they way they should. They certainly don't do much to inspire awe and wonder of the natural universe.

Thanks to Google, I was able to find this wonderful website for making your own scale model solar system:
http://www.exploratorium.edu/ronh/solar_system/

You can plug in a size (the diameter) for the Sun you want to make, then it will tell you what the diameter each of the planets should be, and their orbital distance from the Sun. Your sun will need to be big if you don't want tiny dots for planets. We were going to use a hula hoop, but ended up just making a big circle with a piece of cord so we could have bigger planets. That way, our Jupiter came out to be about the size of a Frisbee, and we then measured and cut the other planets out of paper. Then we taped the planets to sticks so they would stick up out of the ground as we placed them in their orbits.

This is one caveat of the scale model solar system - Keeping the size of the planets in scale isn't too hard, nor is keeping the orbital distance, but doing both at the same time can be very tough. For example - in our model where the Sun had a diameter of 46 inches, and our Earth's diameter came out just under a half inch, if we kept the orbital distances consistent with that scale, Pluto would have to be over 16,000 feet away from our Sun. So we ended up with two scales, one for planet size, and another for orbits. The kids looked at the numbers with me, so they sort of knew that we were changing things from what they really should be.

Still, we found the biggest park we could, and laid out our circle for the Sun, then measured off the distances to stick our planets in the right places. Even though we had to plug in different numbers until we had Pluto no more than 50 or so feet away, the final model was very impressive, and illustrated much better the amount of 'space' in the Solar System.

It was a very fun and educational afternoon for us all. I am actually looking forward to doing it all over again in a year or so for the younger kiddo. She helped the first time, but she was so little, I don't think she could appreciate it yet. It really isn't as much work as it sounds like, with the help of the calculator at the Exploratorium website linked above. It is a very worthwhile activity.


Thursday, May 16, 2013

Geocaching Part 1 - Planning


Geocaching Part 1 - Planning

I promised awhile back to write a more extensive post about geocaching with kids. However, I don’t want to overwhelm with a super long post, so I will be dividing the process up. So here is part 1: planning your geocaching outing. Spring and Summer can be a great time to try out geocaching if you’ve never tried it before. We went out today and found three caches. I’m going to give an account of what we did as an example of how geocaching works. I’m going to do my best to avoid including any details that might provide hints about the location of the caches we found so I don’t accidently share any caching spoilers.

First, I visited http://geocaching.com and pulled up the map of the Regional Park we planned to visit, to see what sorts of geocaches were there. What I consider when planning a geocaching outing with my kids:

-          The difficulty rating for the cache. While 3 and 4 star difficulty caches are very rewarding for me to find, my kids usually lose interest in searching well before I do. I stick to 1 and 2 star, maybe 2 ½ when they are caching with me to keep it fun.

-          The terrain rating. For this I stick to a 3 ½ star rating or under, even on my own because I’m not all that fit. I don’t want to have to do any climbing or other difficult maneuvers to reach a cache. There may be a 3 or a 3 ½ I won’t be able to get to, but so far those have been obtainable for us even if slightly tiring if they are up a steep hill or something similar.

-          The size of the cache. The kids love the cheep silly ‘swag’, or treasures that are available for trade inside some geocaches. Micro caches are often to small to hold any swag. I try to make sure most of the caches we will be searching for on an outing are ‘small’ or larger. Sometimes a hide is so clever and fun on its own they enjoy finding it just for the sake of finding it (as I do) but usually, they want the swag.

-          The hike involved. We are tackling longer hikes as time goes along and they grow, but I still have to consider a hike length that will keep things fun for them. Sometimes we will skip the hike all together and focus on finding ‘urban’ caches. These are ones that are hidden in parking lots, or neighborhood playgrounds, or sometimes inside local businesses. We found one on the bookshelf at our library! The downside to urban caches is that they tend to be small because it is harder to hide a geocache in a busy area. It can also be harder to search in a high traffic shopping center, for example, without strangers wondering what you’re up to.      
           
For your first geocaching outing consider looking for a ‘beginner’ cache. When you visit http://geocaching.com and  under the “Play” tab pick “Hide or Seek a cache” then enter the area you want to look in, you will be shown a list of caches in that area. Caches that the hider thinks would be good for a beginner will be highlighted in green.

Next time I’ll go over what to take with you on your geocaching outing.

Thursday, May 2, 2013

Legends Series by Anthony Horowitz – Book Review


Legends Series by Anthony Horowitz – Book Review


My daughter has always loved retellings of the Greek and Roman myths. I picked up ‘Legends: Tricks and Transformations’ by Anthony Horowitz for her at the library, and once she started reading it, she zipped through all the stories in just a few days. She has since read the ‘The Wrath of the Gods’ volume as well, and told me she would like to read the rest. From a kid, I think that’s a darn good recommendation.


The reading level for these books are listed as 9 and up, and my daughter was 8 when she started reading them, and did not have any difficulty with the reading level. However, the old mythology itself, as most of you probably know, can be brutal. While I believe this is a child-friendly version, if you have a sensitive kid, these myths may not be a good choice, no matter who is telling them.

Tuesday, April 23, 2013

Make Flowers Change Colors - Fun Stuff To Do Anywhere

Make Flowers Change Colors - Fun Stuff To Do Anywhere


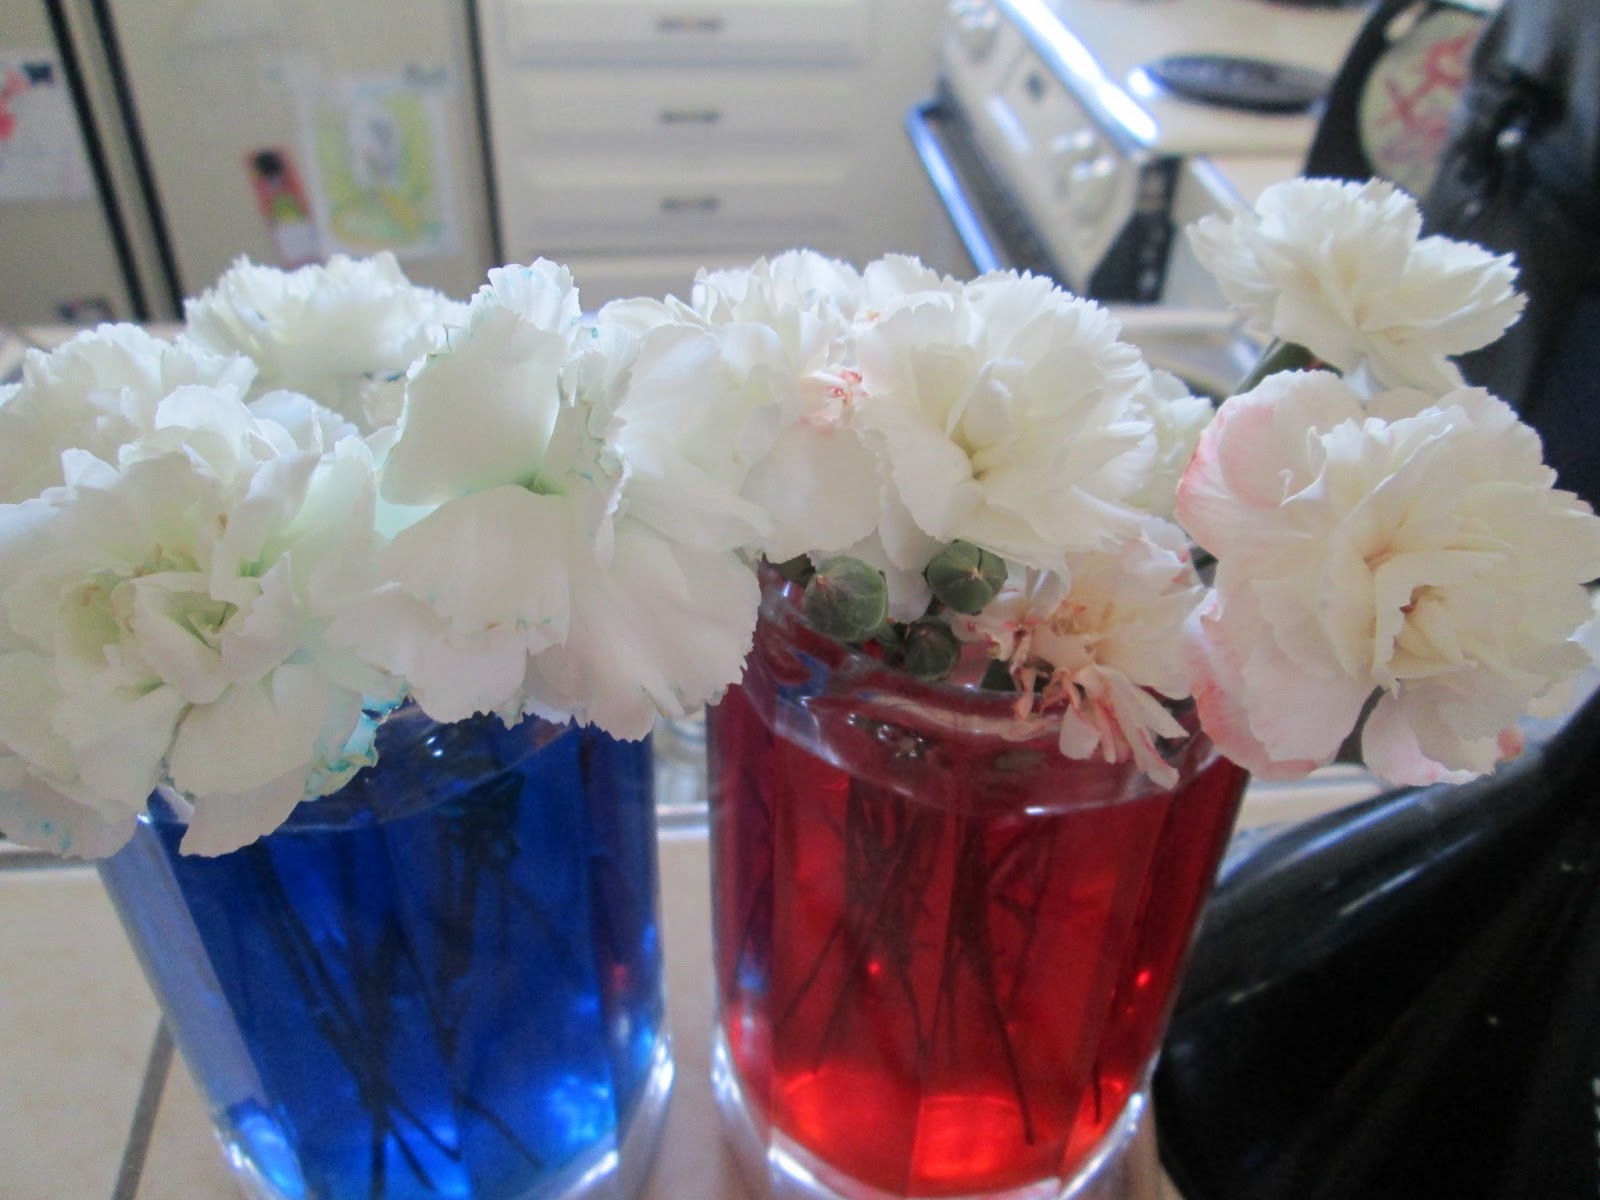
While studying plants recently, we decided to try the age-old flower dying experiment. Although we didn't have as much success as we have had in the past (when my oldest did this same experiment), we are still starting to see some color change, and the kiddo had fun with it.

All you do is add some food coloring to a vase of water, then add your flowers. White flowers tend to work the best - make sure to give then a fresh cut stem before putting them into the colored water. Although, kids will often use a celery stalk as well. I think it's better if there are some leaves still on the celery as opposed to the pre-cut ones.

This experiment shows how plants pull water up through their stems into their petals
 and leaves.

Tuesday, March 19, 2013

Start a Garden – Fun Stuff to do Anywhere


Start a Garden – Fun Stuff to do Anywhere

If you started some seeds indoor earlier in the year, they are probably ready to move outside either into the ground, or into larger pots.


We have never lived in a house with a yard big enough for a garden in the ground. So I have become a good container gardener over the years. So if all you have is a small apartment patio or balcony, you can still create a little garden to grow stuff with your kids.

We have grown tomatoes, potatoes, bell peppers, broccoli, peas, herbs, flowers, zucchini, cantaloupe, strawberries, and blueberries in pots over the years. The bigger plants may need pretty large containers to grow well in, but it can be done. Pick a few of your favorite fruits or veggies, and start growing! For tomatoes, or vine-y or sprawling plants like cantaloupe or zucchini, I find that cages help the plant to grow without sprawling out of the pot and breaking the stems.

It isn't too late in the year if you want to start from seed. You can start indoors, or right outside if you want. If you'd rather get more of a running start at your garden, lots of plant centers have good sales this time of year on seedlings.

Each plant will have it's own slightly different requirements about how much sun and water and spacing they like, so just follow the instructions that come with your plant or seed packet, and watch your garden grow.

Tuesday, March 12, 2013

Play a Card Game – Fun Stuff To Do Anywhere


Play a Card Game – Fun Stuff To Do Anywhere

Playing a card game with your kids can have multiple benefits. You get some good fun together time, and hopefully some conversation too, but additionally, many card games are great for math practice.

Simple card games like 'Go Fish' or 'War' are good to play with younger children. Then games like 'Twenty-one' or 'Cribbage' can introduce some simple strategy and mental addition. There are literally hundreds of card games out there.

There are great books full of games, or pagat.com has rules for a slew of games too.


Tuesday, March 5, 2013

Put Together a Jigsaw Puzzle – Fun Stuff To Do Anywhere


Put Together a Jigsaw Puzzle – Fun Stuff To Do Anywhere

I remember putting puzzles together with my mother when I was small, but for some reason I never thought about doing it with my own kids until recently. They did simple 25 piece, then 50 piece puzzles as preschoolers on their own and loved them. Often they would put the same puzzle together over and over again. But when they moved on to 100 piece, they did one or two and stopped. I thought they had outgrown puzzles, but now I think it was something else.

I think they hit a point where the puzzles were more challenging and they became intimidated. We did a 500 piece puzzle together, and in the beginning they acted discouraged before we’d even really begun. Once the boarder was put together, and some other small parts had been assembled enough to be recognizable, their enthusiasm for the project grew. Every piece placed was a tiny celebration.

We didn’t try to put it together all in one sitting, or even all in one day. I think that would have been more than they could take. But we ended up having a lot of fun, and I look forward to another group jigsaw puzzle again soon, although some puzzles at the store have gotten pricey in my opinion, but sales and thrift stores, and garage sales are great places to pick a puzzle up if you want totry one out without spending much to start.

Thursday, February 28, 2013

Sutter's Fort – Outside the Bay


Sutter's Fort – Outside the Bay

Another great spot to visit for kids interested in California history is Sutter's Fort in Sacramento. Many of the rooms of the fort have been restored to demonstrate their original purpose. The fort isn't large, and we took our time exploring and reading signs, even revisiting spots that the kids wanted to go back and see again, and still finished in les than two hours.

Our kids liked being in charge of the map and looking up the purpose of various areas of the fort. There is also a lot of open space in the center of the fort for little legs that need to let out some energy in running around before they can pay attention to the history again.

Admission is $5 for adults and $3 for children, and kids under 5 are free. The State Indian Museum is on the same grounds as Sutter's Fort, just outside the fort gates, and I believe a discount pass can be purchased if you plan to visit both places. We did not go into the State Indian Museum, but would like to go back to do so.

In addition to Sutter's Fort, our kids wanted to spend some time at the walkway and pod next to the fort. The pond is home to ducks (there were baby ducklings when we visited) and turtles and squirrels, and the kids did not seem to tire of watching the animals.


Tuesday, February 26, 2013

Letterboxing – Fun Stuff to Do Anywhere


Letterboxing – Fun Stuff to Do Anywhere

After last week's introduction to geocaching, I thought this week, I should introduce geocaching's low-tech predecessor: letterboxing.

Geocaching and letterboxing share a lot in common. The idea for both is to go out into the world, often into nature, and find the hidden container. In geocaching, there will be a logbook, and possibly some swag for trade in the container. In letterboxing, there will be a logbook and a stamp. You can bring your own stamp to mark the logbook with, or just write your name, and you can use the stamp in the letterbox to mark your own book to show you made the find. You should not trade or take anything from a letterbox.

The benefits of letterboxing is that no special technology is required (other than looking the letterbox up online before leaving home.) Instead of GPS coordinates, letterboxing uses landmarks and more old-fashioned treasure hunting terms. For example you could be instructed to find a particularly noticeable tree, and go ten paces to the north, then turn right, and so on.

The downside of letterboxes is that there are far fewer of them around than geocaches. The website we've used is www.letterboxing.org, but we've only found two letterboxes. If you are an experienced letterboxer, and have other online resources you can share, please do so in the comments.

Thursday, February 21, 2013

Pleasant Hill Park – Pleasant Hill


Pleasant Hill Park – Pleasant Hill

Pleasant Hill Park is located just off highway 680 on Gregory Lane in Pleasant Hill. Pleasant Hill Park has some great features that make it one of our favorites to visit if we're in the area.

There are three structured play areas. One is for older kids and has a traditional jungle gym, and a few other spinning sorts of pieces of equipment. There is also a separate gated off toddler play area with smaller equipment for the littler ones. In between these two areas is a sandy play area with a strange sort of low climbing tunnel structure that my kids love. There is also a digging contraption in the sad area, but of course you can bring your own sand toys to enjoy there as well.

Even when I had a child that was young enough to use the toddler play area, we didn't use it much. It is great if you only have very young children, as the fence will keep them from running off when your back is turned, but if you also have older children, it is very difficult to see the other play area well from the toddler area.

In addition to the play structures, there is a good amount of open grass, and sidewalks. There is usually some biking as scootering going on along the sidewalks when we visit.  Also, some basketball courts, and swings are available some distance from the rest of the playground.

In the summer, I like that there are lots of mature trees all around the Pleasant Hill Park, so finding a shady spot to sit and rest is not a problem. There are three reservable picnic areas, and two open picnic areas. We did do a birthday party at Pleasant Hill Park once and were able to claim one of the open areas to set up for cake, etc. without too much trouble, but availability will vary every weekend I would expect.

There is street parking available right on Gregory Lane, but when that is full, there is a parking lot adjacent to the park where I have never failed to find a space.

Tuesday, February 19, 2013

Geocaching – Fun Stuff to Do Anywhere


Geocaching – Fun Stuff to Do Anywhere


I've wanted to write a post about geocaching for a while now, but couldn't decide where to put it. I can certainly be done almost anywhere in the Bay Area, but I think it could deserve it's own full review like the Thursday activities get. So, I decided to do both.

This week will be just a quick introduction to geocaching, and in a future week, I'll write a more expansive post with ideas to take you deeper into the hobby of geocaching.

Basically, geocacaching is a treasure hunting game played with a GPs device, and the website geocaching.com. There are other websites as well, but this is the main, and most popular one as far as I know. The website offers a few different ways to search for nearby caches. You can enter an address and get a list of geocaches close by. I personally like the 'search on the map' function. It gives me better information about where a cache is than just how many miles from the entered address.

Not all geocaches are kid or family appropriate. There are a number of different attributes that can be added to each cache listing to describe it. For your few outings, you may want to look for caches that are labeled as "kid friendly" or listed as "beginner" caches. I've hunted for caches along busy roads and other places I wouldn't have wanted to take my children. That's another reason to check out the map on geocaching.com before heading out to your hunt – make sure it is an area you'll all feel safe.

Luckily, most are very family friendly. If you have a popular walking trail near you home, or park, or regional open space, there are great odds there will be several geocaches there for you to find.

What my kids like best, is the swag. If you are looking for a cache labeled 'small' or larger, then there may be small toys, coins or other little items inside. If you bring small items to trade, you can put in your item, and take some other trinket out of the cache. My kids have traded for things like beads, rubber bouncy balls or matchbox cars. Try to keep the trades fair, so the next kids to come along have something fun to pick out too.

We have a hand held geocaching GPS, but you can geocache with just a smartphone ap if you don't have a GPS. (Car GPS devises don't work well for geocaching). Geocaching.com has their own ap that costs $10, but I have used and like c:geo, and it is free. You do need to go to geocaching.com and sign up there for an account first to use c:geo and some of the other free geocaching aps out there.

If you're ready to get started, the geocaching.com website can walk you through finding your first cache. Otherwise, I'll be back with even more geocaching fun for you and your family another week.


Thursday, February 14, 2013

NASA Ames Research Center at Moffett Field

NASA Ames Research Center at Moffett Field

NASA Ames Research Center has an Visitor Center Museum that is free to the public and open Tuesdays through Fridays from 10am to 4pm, and Weekends from Noon to 4pm. They are closed on Mondays and Federal holidays.

Even though the museum looks small, my daughter and I spent the hour we had available there, and could easily have spent more time if we'd been able. It isn't that there is so very much to see, but many of the exhibits are interactive, and includes some games that she wanted to spend considerable time on. I eventually had to pull her away so we didn't miss our tour.

Fortunately, there is also a free website where they offer very similar games, if slightly simpler,  to the ones she enjoyed at the NASA Visitor Center. It is at: http://www.scigames.org/

From their website, it sounds as if the exhibits in the Visitor Center change on a fairly regular basis. If you visit the NASA Ames Visitor Center web page you can also see a schedule of events and presentations that happen throughout the day so you can time your visit accordingly if there is something your family would be interested in.

The NASA Ames research Center also offers free school and homeschool group tours. That was the main reason we made the trip there. We just stopped to check out there Visitor Center since we made it to Mountain View so early, and I'm glad we did. The Visitor Center would have been closed at the end out our field trip, and it was well worth the time we spent there.

Although I did not set up the field trip myself, I was lead to understand that setting one up is more complex than other field trips might be. Moffett Field is a working NASA research center and they take security seriously. I believe the mom who organized our group had some hoops to jump through, and as a chaperone  I had to make sure I had registered with our group appropriately, and had my identification all in order. Despite all of this, the trip was amazing and wonderful. When my youngest child is old enough, I would not hesitate to put in the work needed to set up a tour for her. And, on the plus side, it was all free.

The trip is aimed at kids in 4th through 6th grades. They get to do a lot of hands on guided lessons. They even did two mini 'missions' that involved assigned age-appropriate research tasks, and communicating their finding to the rest of their crew.

Information about how to set up a field trip is also available at the same link for the Visitor Center.

Tuesday, February 12, 2013

Stomp Rockets - Fun Stuff to Do Anywhere

Stomp Rockets - Fun Stuff to Do Anywhere

Since we have had such beautiful weather lately, it's been nice to get outside. Stop Rockets are a great outdoor, park going activity.

Stomp rockets work by forcing air up a tube into the hollow inside of the rocket and launching it into the air when the end of the tube is 'stomped' on. There are a lot of different brands that can be found at hobby shops or toy stores.

Kids love rockets, at least, every kid I've ever met. I'm sure there are some out there somewhere that don't. It takes them a long time to get tired of stomping. Then there's all that running after the fallen rockets to retrieve them, which is great exercise.

There is even a little bit of science and experimentation involved as they try stomping harder of softer and adjust the angle to see what will happen.

We have the rockets pictured below. I like them because they don't go too high, and are safe to use in our local park. I also found a book about how to make your own. That sound like a lot of fun too!


Thursday, February 7, 2013

Bad Kitty by Nick Bruel – Book Review


Bad Kitty by Nick Bruel – Book Review

Bad Kitty by Nick Bruel was a quick favorite with my then kindergarten kiddo. Unlike many other things she loved back then, she hasn't 'outgrown' the Bad Kitty books. She squealed with excitement just last week (now a 4th grader) when she saw that the library had the newest book in the Bad Kitty series.


The first Bad Kitty book (above) is a picture/alphabet book with one letter for the alphabet for each food Bad Kitty can try when they run out of her regular food, then again for each naughty thing Bad Kitty does, and then another one for each nice thing she does to make up for it. So it takes you through the alphabet several times. However, unlike most alphabet books, the words are not simple. I found it as amusing as my kids do.

The other books featuring Bad Kitty, however, are short chapter books, heavy with illustrations. They were perfect for my daughter when she was a strong enough for longer stories and chapters, but still intimidated by big blocks of text. She would read each book over and over again, and I could hear her giggling every time.


Tuesday, January 15, 2013

Photography - Fun Stuff to Do Anywhere

Photography - Fun Stuff to Do Anywhere

My kids always like it when I let them have my camera to take pictures of whatever they like. That's part of the beauty of the digital age. I was never allowed to take photos as a child because I would 'waste' film. You don't need a fancy camera to call it 'photography'. Even a camera on a cell phone will make the kids happy.

To go a step further, you might print out their favorite photos and make a scrapbook, or even frame one for their room. You can take a hike or just let them pose their toys at home for a snapshot. Most county fair offer a photography category for kids if they want a chance to see their pictures displayed, and maybe have the chance to win a couple bucks.

Tuesday, December 4, 2012

Sew a Monster Friend – Fun Stuff to Do Anywhere


Sew a Monster Friend – Fun Stuff to Do Anywhere

Sewing is a useful skill to have, for both boys and girls alike. A great way to start learning about sewing is to make something with felt. Felt is very forgiving, inexpensive, comes in lots of fun bright colors, and you don’t need to worry about raw edges. If you just need a good rainy day activity, and are not quite ready for sewing lessons, this can even be done with Tacky glue instead of stitching.

Monsters are fun to make because if they turn out looking a little strange, or goofy – well, that what monsters are supposed to look like!

Start by having your child make a simple drawing of what they might like their monster to look like. Emphasize for them to keep it simple. While thirty eyes and twenty arms might look cool, actually trying to cut out and sew them may not work so well, you could suggest maybe five eyes would be enough.
Next, you can let your child pick out a few colors of felt to use. Again, try to help them keep it simple.

Using their drawing as a guide, cut out the shapes you’ll need to make the monster. You, as the grown-up will have to make the call if this is a step your child can do on their own or one you’ll do for them. Any parts that you want to stuff, make sure to cut out both a front and a back for, this would include at least the body.
Simple chain stitches can attach any embellishments to the body of the monster. If thin parts like arms or antenna are needed, I would just keep those as a single layer of felt, and sew them into the seam between the two body layers.

Sew around the outside either with a chain stitch or a whip or blanket stitch, making sure to leave an opening for stuffing. After the monster is stuffed to your satisfaction, go ahead and sew the stuffing hole closed.

As an extra little sewing lesson, I like to have the kids use buttons for eyes. It’s always useful to know how to sew buttons on! If you want to make a no-sew monster, just use Tacky glue (it works much better than Elmers on felt) to glue on the decorations, and a line of glue around the edge for the seam. You’ll want to let the body seam dry before stuffing so it doesn’t pull apart once you start to add the stuffing, then just close the stuffing hole with a line of glue as well.

Ta Da! A little monster friend!

Thursday, November 29, 2012

Legion of Honor Museum in San Francisco


Legion of Honor Museum in San Francisco

The Legion of Honor Museum is located in Lincoln Park at 100 34th Avenue at Clement Street. It showcases ancient and historical European art.

My children were very young when we visited the Legion of Honor, yet I was surprised how much they enjoyed it. What helped, I believe is that we spent a little bit of time learning about ancient art before we visited, so they were able to recognize some of what they had learned about. A trip to the Legion of Honor would go along very nicely with the study of ancient Romans, Greeks or Egyptians, as well as European history from the medieval times up to the early twentieth century. They also have some special exhibits, and you can visit their website (linked above) to see what is current.

My youngest was two when we visited and while she wore out before we’d seen all there was to see, it was a lot of fun to watch her, and see what pieces spoke to her. The elaborate chandeliers in each room may have fascinated my children more than any of the art did, but that was interesting too.

The Legion of Honor is closed on Mondays, and is free on the first Tuesday of the Month, and is always free for children under 12 years old.

We visited on a free day and arrived right at opening, and had no trouble finding parking right out in front. When we left, it looked like parking was more of a problem, so I recommend arriving early or taking public transportation if you have the option.